

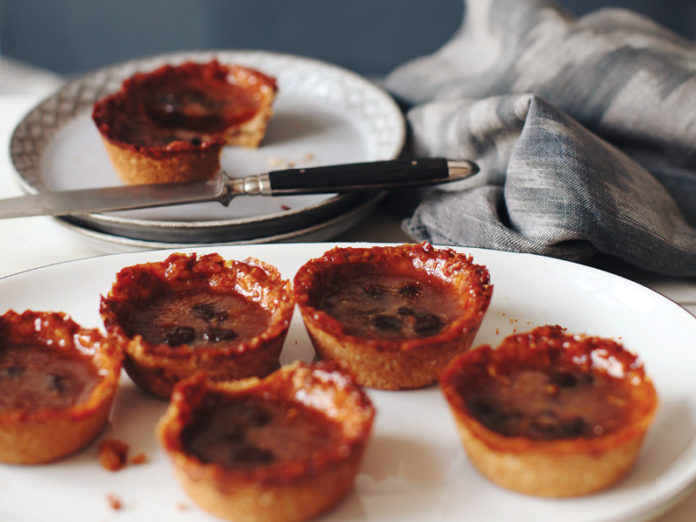
According to my mom, “Butter tarts are a truly Canadian thing. Like peacekeeping! And Tim Hortons!” This version has replaced the white flour and lard but still retains the ooey, gooey, caramelly goodness.
Serves 12
Ingredients
Crust
- 2 cups rolled oats (gluten-free, if possible)
- 1 cup brown rice flour
- 1/2 tsp. sea salt
- 6 Tbsp. brown rice syrup
- 5 Tbsp. coconut oil, melted
Filling
- 1/2 cup brown rice syrup
- 1/4 cup barley malt
- 2 Tbsp. arrowroot powder
- 2 Tbsp. vegan butter, melted (or coconut oil)
- 1 vanilla bean, seeds scraped
- 1/4 tsp. baking powder
- 2 pinches sea salt
- 1/3 cup organic raisins (optional)
Directions
Preheat oven to 325°F.
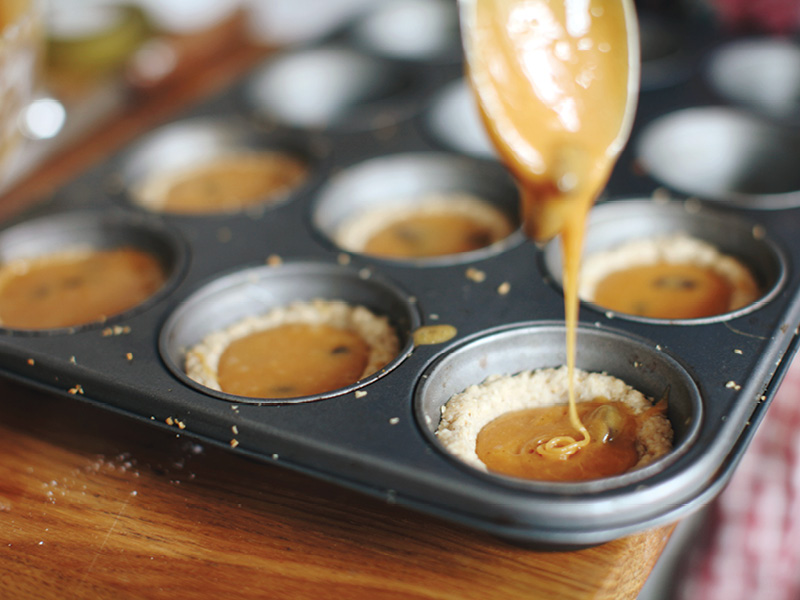
Crust: in a food processor, blend the rolled oats on high until you have a coarse flour. In a large mixing bowl, combine oat flour with brown rice flour and salt. In a small saucepan, melt the coconut oil and brown rice syrup together, pour it over the dry ingredients and mix with a spoon until everything is incorporated. You may need to use your hands to knead the dough.
In a standard muffin pan, press a golf ball-sized amount of dough very firmly into each form, press them high up the sides.
Tip: the thinner the crust, the better; they puff up when baked.
Bake shells for 10 minutes or until edges are a light golden colour. Cool.
Filling: melt the ghee in a small saucepan over low heat. Add seeds of one vanilla bean pod.
In a medium bowl, measure the brown rice syrup and barley malt. Pour in the melted ghee, whisk to combine with the sweeteners. Sift in the arrowroot and baking powder, add salt (unless you are using salted butter) and whisk until completely smooth. Fold in the raisins.
Fill each baked shell to just below the rim of the crust. Bake 20 minutes or until the filling is bubbling and brown around the edges. Remove and let rest, then refrigerate until completely chilled. This is an important step because it will crystallize the sugars, making removal of the tarts very easy.
Using a very sharp knife, insert the tip of the blade down along the side of each tart breaking the sugar seal, if necessary – they should pop out of the mold very easily. If not, pierce the sugar seal in a couple places until you can remove them. If they are stubborn, keep them in the fridge until colder. Once removed from their molds you can keep the tarts at room temperature in a tightly sealed container and warm them a little before serving, if desired. Keeps fresh for a week.
Nutrition facts per serving: Calories 284; protein 3 g; fat 0 g; carbs 47 g.

Read This Story in Our 2025 Holiday Gift Guide
Our dedicated elves at IMPACT Magazine have been putting in overtime to reveal the most exciting gifts in health, fitness, adventure and sports for this season’s holiday gift guide. Explore this year’s latest fitness gadgets, cool appliances to perfect your festive meals, top-notch gear to keep you moving this winter, and fantastic solutions to help you achieve your fitness goals. We are sure to have something for everyone on your list.


