


You know that bunch of tiny, fresh greens that comes on top of your avocado toast at a cute breakfast spot? It kind of looks like green confetti? Those are microgreens! They are adorable, look gourmet and are packed full of both flavour and nutrients. And the very best thing about microgreens—they’re easy to grow. Like so easy.
Microgreens have been around for a long time, but really had a “glow-up” over the last 10 years. They’ve spiked in popularity with both restaurants and home gardeners. Trendy cafés, upscale spots and even diners have embraced topping savoury and sweet dishes with microgreens. Gardeners, both beginners and long-time growers, have jumped in head first, growing microgreens in creative ways.
They are inexpensive to grow (I’ve calculated the cost of growing one tray of microgreens to be only $2), can easily be grown in any season and don’t require much set-up or supplies to get going.
Plus, scientists have found microgreens have incredible health benefits. According to Medical News Today, evidence suggests microgreens have an extremely high antioxidant count, which can help prevent a range of diseases.
There’s a lot to love about microgreens, so let’s dive in.
WHAT ARE MICROGREENS?
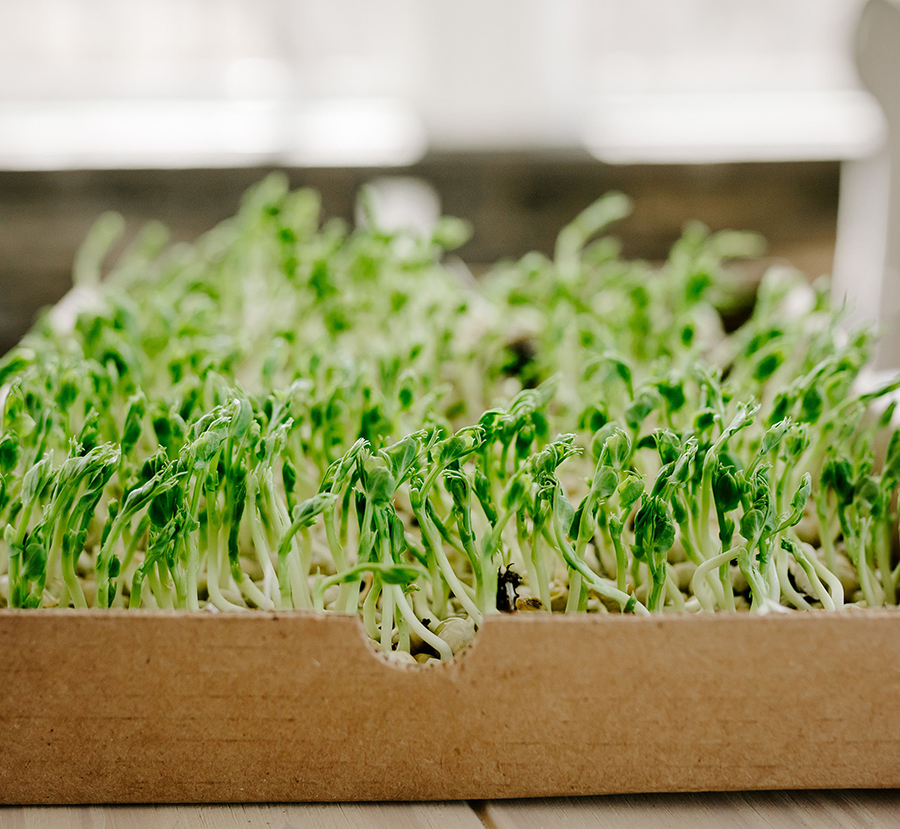
The word “micro” says it all — microgreens are newly germinated seeds that are still in their seedling stage. Microgreens are typically harvested after 12 to 21 days of being seeded.
The easiest way to think of microgreens is as a baby vegetable that hasn’t yet developed into its full form. For example, you can grow kale microgreens, which are just the baby stage of what could eventually mature into the full vegetable if you let it continue to grow under the proper conditions.
Professional gardeners will often refer to microgreens as cotyledons. This is the food source of the plant embryo. Cotyledons are the first leaves the emerge from the soil as a plant germinates.
WHAT’S THE DIFFERENCE BETWEEN MICROGREENS AND SPROUTS?
Though they look similar, sprouts and microgreens actually have several differences. The biggest difference between the two is that sprouts are germinated seeds whereas microgreens have a developed stem and leaves.
Another key differentiator is how you grow them. Microgreens are grown using soil, peat moss or vermiculite. The seeds germinate in the medium and grow stems vertically.
On the other hand, sprouts are typically grown in water or can germinate on a moist paper towel if kept very humid.
A few other differences between sprouts and microgreens:
• Sprouts grow quicker and are usually ready to eat within five to eight days.
• Sprouts have a more pungent smell and taste than microgreens, which is sometimes described as bitter.
• Sprouts have a lower nutritional value than microgreens. They are lower in fibre and amino acids. Sprouts are even easier to grow than microgreens. They don’t require much light and can easily germinate from natural sunlight even in the winter months. Plus, all you need to grow sprouts is a jar, water and high-quality seed.
WHAT ARE THE EASIEST TYPES OF MICROGREENS TO GROW?
Ah — the golden question all new gardeners want to know! What’s the easiest thing I can grow?
Well, when it comes to microgreens, I’ve found the smaller the seed, the easier it is to grow. Typically, salad greens, brassicas and mustards are all smaller seeds and easier to grow. Whereas pea shoots and sunflower seeds are larger and more difficult. It can be tricky to keep the larger seeds moist during the germination period. If microgreen seeds don’t have enough moisture, they won’t germinate and your tray will have spotty areas.
WHAT DO YOU NEED TO GROW MICROGREENS?
• High-quality seed
• Trays as simple (store-bought berry or mushroom containers) or complex (tailor-made microgreen trays) as you like
• A growing medium like straight vermiculite, or organic veggie and herb potting soil
• Full spectrum LED grow light (optional)
• Small fan for air circulation (optional)
• Shallow tray for bottom watering (optional)
• Spray bottle (optional)
HOW TO GROW MICROGREENS IN FIVE EASY STEPS
STEP 1:
In a large bowl, mix your growing medium, with water. You want your soil to be damp but not have standing water. It should be wet enough that it forms into a ball easily and holds it shape when you squeeze it. Add one to two inches of your damp medium to the bottom of your tray.
STEP 2:
Heavily seed your tray so that the entire soil surface is covered in seed. This is unique to growing microgreens compared to most other edibles. You do not need to space apart your seeds; you want them to cover the entire tray. This will give you a nice full tray of microgreens. Once your tray is completely covered in seed, use your spray bottle to thoroughly mist your seeds with water. Be sure to get all seeds wet. You should have standing water droplets on the surface.
STEP 3:
This is the most important step. It’s the blackout period. This is when you’ll cover your microgreens with either a black plastic garbage bag, or stack another tray on top to keep out any light. Why? In the dark, microgreens will have to stretch out to look the light source. This results in longer, slimmer and more tender microgreens.
Keep your microgreens blacked out for three to five days as they germinate, uncovering every 24 hours or so to mist with water and then covering again.
STEP 4:
Remove microgreens from darkness and place under a grow light or direct sunlight. Continue misting soil daily to keep seeds and soil wet. You can also water from below if you have a second tray underneath. I especially like doing this as it promotes stronger root growth.
STEP 5:
After five to eight days under light, your microgreens should be three to five inches tall and ready to harvest. To harvest, use a sharp pair of scissors or a knife and cut at the base of the stem right above the soil surface.
Welcome to the world of growing microgreens! Once you start and realize just how easy it is, I’m sure you’ll have a fresh tray growing weekly in your home. Happy planting.
EASY TO GROW MICROGREENS
• Swiss chard
• Amaranth
• Arugula
• Beet
• Mustard
• Pac Choi
• Broccoli
• Cress
Photography by Maggie Wysocki

Read This Story in Our 2022 Summer Outdoor & Travel Digital Edition
Cold Water King, Core-Centric Fitness, Prepare for Hiking Season, Mountain Bike Fundamentals, The Simple Ways Movement Gives Us ‘Hope’, recipes and much more!


